How to Melt HD Lace Without Glue (Beginner Method)
One of the first things beginners notice after buying a wear-and-go wig is this:
The wig looks great… but the lace still looks like lace.
Even with HD lace, the difference between “wearing a wig” and “it looks like my scalp” comes down to one thing:
The melt.
The good news?
You don’t need heavy glue or salon-level skills to get that seamless, invisible hairline.
You just need the right beginner-friendly technique.
This guide will show you exactly how to melt HD lace without glue, using simple steps that work perfectly for glueless and wear-and-go wigs.
What Does “Melting the Lace” Actually Mean?
When people say a wig is “melted,” they mean:
-
the lace blends into the skin
-
the hairline looks undetectable
-
there’s no visible edge or grid
-
it looks like the hair is growing from your scalp
Melting doesn’t always require glue.
With modern HD lace and pre-cut hairlines, you can achieve a natural finish using light, non-damaging methods.
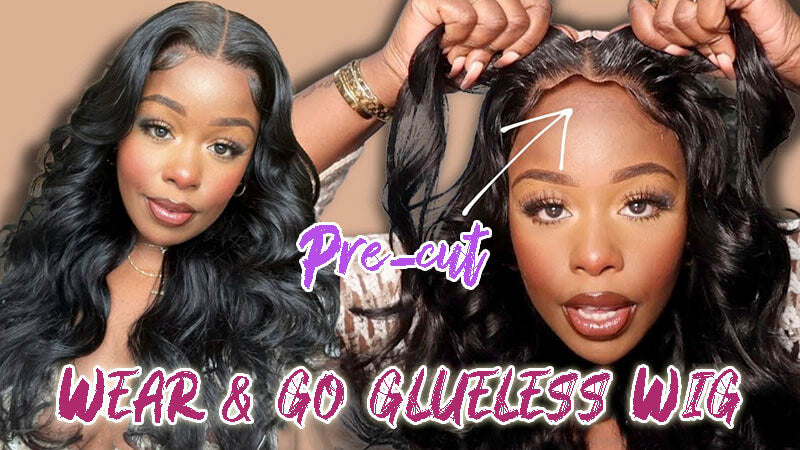
Can You Melt HD Lace Without Glue?
Yes — especially if your wig is:
-
wear-and-go
-
glueless
-
pre-cut lace
-
HD lace front
Most beginners don’t need full adhesive.
Instead, you can use:
-
melting spray (light hold)
-
an elastic melt band
-
scalp tint/powder
-
proper lace placement
This creates the illusion of a professional install, without commitment.
Beginner-Friendly Method: How to Melt Lace Without Glue
Let’s break it down into a realistic routine you can do in under 10 minutes.
Step 1: Start With Clean Skin
This is the most overlooked step.
Even without glue, lace won’t sit smoothly if your forehead has:
-
oil
-
skincare residue
-
makeup buildup
Use a cotton pad with:
-
micellar water
or -
alcohol-free skin prep
The goal is just a clean surface so the lace can lay flat.
Step 2: Place the Wig Correctly (Don’t Pull It Too Far Down)
Many beginners make the wig look unnatural by placing it too low.
A natural hairline should sit slightly back — not on the eyebrows.
Position the wig where your real hairline would naturally begin.
This instantly makes it look more realistic.
Step 3: Tighten the Band for a Secure Fit
A glueless melt starts with a secure cap.
Adjust:
-
elastic band
-
back straps
-
ear tabs
If the wig is shifting, the lace will never look fully blended.
A good wear-and-go wig should feel snug without needing glue.
Step 4: Use a Light Melting Spray (Not Wig Glue)
This is the beginner secret.
Instead of adhesive glue, use a lace melting spray or “freezing spray.”
Apply a small amount only at:
-
the hairline edge
-
the temples
You’re not gluing it down — you’re just helping the lace settle.
Less is more.
A heavy hand can make it stiff or messy.
Step 5: Tie Down With a Melt Band (The Magic Step)
This is what creates the real melt.
Wrap an elastic wig band firmly around the hairline and leave it for:
-
5–10 minutes
This presses the lace into the skin and smooths out any lift.
It’s the same trick stylists use — just without glue.
When you remove the band, the difference is immediate.
Step 6: Add Scalp Powder for an Invisible Finish
Even HD lace can look slightly “ashy” or pale, especially in daylight.
A tiny bit of powder makes it disappear.
Use:
-
foundation powder
-
lace tint powder
-
scalp concealer stick
Focus on:
-
the part line
-
the lace edge
This gives the illusion of a real scalp underneath.
Step 7: Flatten the Hairline (Optional but Powerful)
Sometimes wigs look “wiggy” because the roots are too puffy.
Use a hot comb on low heat to press the top down.
Just one pass near the part can make the wig look installed.
The Most Natural “No-Glue Melt” Look Comes From These Details
Here’s what actually makes people believe it’s your hair:
-
pre-plucked hairline (not too dense)
-
soft baby hairs (not overdone)
-
lace that matches your skin tone
-
realistic density (150–180% is best for daily wear)
-
proper placement + melt band
The melt is a combination of small things — not one magic product.
Common Beginner Mistakes (Avoid These)
Using Too Much Spray
A little is enough. Too much can cause buildup and stiffness.
Cutting Lace Too Close
Pre-cut wigs help avoid this, but if you trim, always leave a tiny margin.
Over-styling Baby Hair
Real hairlines are imperfect. Baby hair should be minimal.
Skipping the Melt Band Step
This is the step that makes the lace truly disappear.
Best Wigs for Glue-Free Melting
If you want the easiest melt, look for wigs that are:
-
HD lace
-
pre-cut lace front
-
pre-plucked hairline
-
glueless cap design
-
wear-and-go ready
These wigs are built for beginners who want realism without the installation stress.
Final Thoughts: You Don’t Need Glue to Look Installed
A flawless lace melt isn’t about being a professional.
It’s about using the right beginner method:
Clean skin
Correct placement
Light melting spray
Melt band pressure
Scalp powder finish
With HD lace, especially on wear-and-go wigs, you can get that invisible hairline in minutes — no glue required.
Ready for an Effortless Melt?
Explore beginner-friendly HD lace wigs designed for natural, glueless wear:
➡️ SISDORE HD Lace Wig Collection
If you're wearing a wear-and-go wig, you may also want to read our full guide on Wear-and-Go Lace Wigs for Beginners.
For a complete breakdown of lace types, cap sizes, and how to choose the most natural wig, visit our Complete Lace Wig Guide.


Leave a comment